Home 10G Network Lessons
My home network now runs on 3Gbps fiber, 10G switching, and NVMe storage. The useful lessons came from the mistakes: too few Ethernet drops, the wrong 10G transceivers, and underestimating WiFi coverage.
Ben Houston • • 6 min read
My home network now has 3Gbps fiber, 10G switching, PoE access points, and an NVMe-backed TrueNAS server. It works well, but I made a few expensive detours getting here: too few Ethernet runs, the wrong 10G adapters, and a first NAS design that felt slow for daily use.
The Foundation: Fiber Internet#
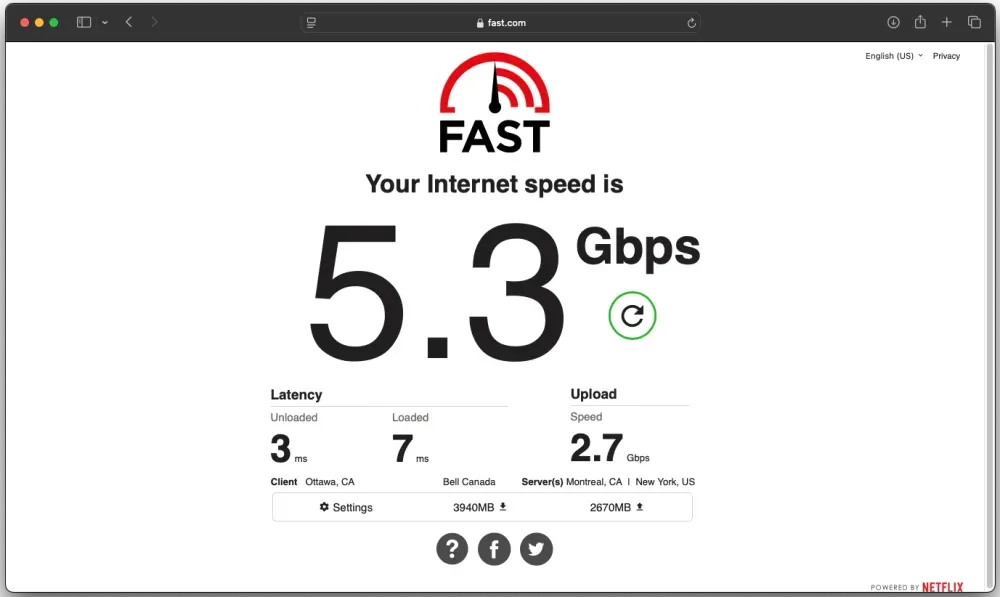
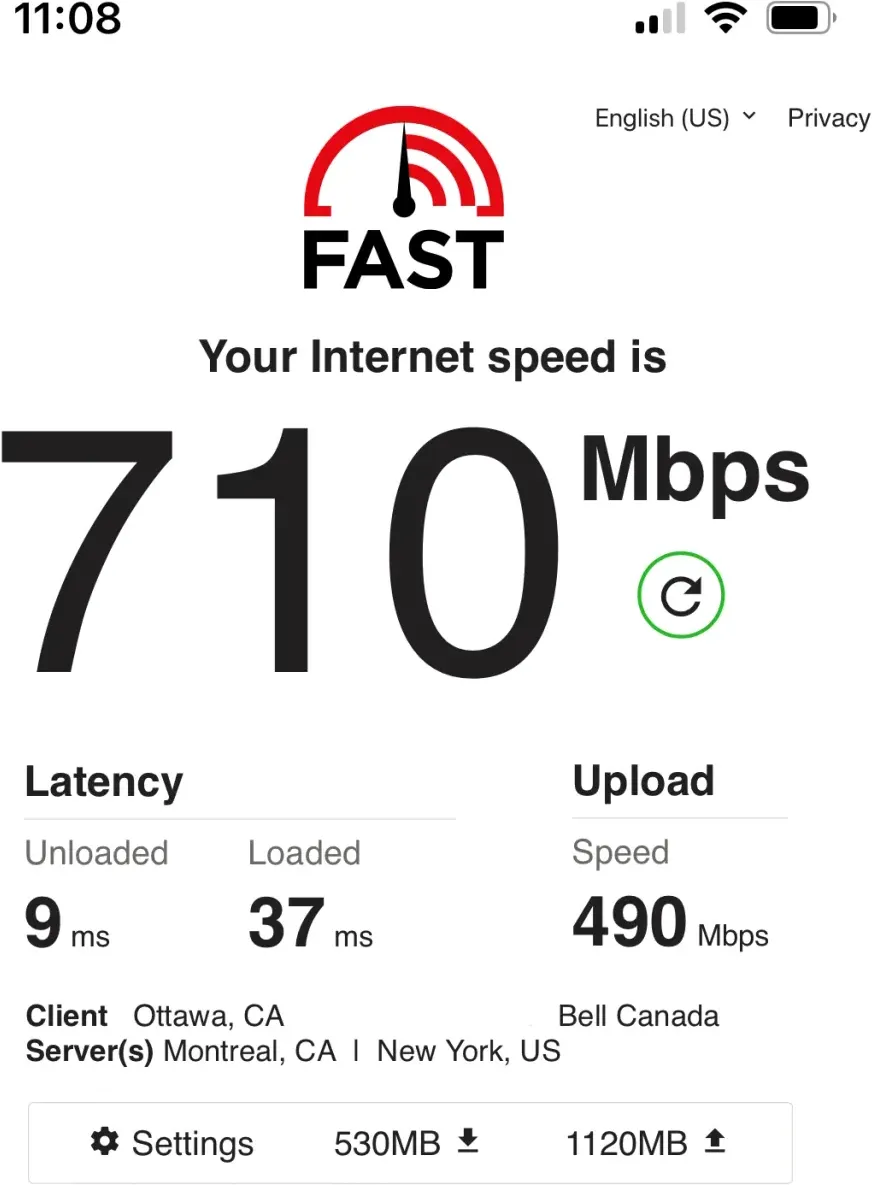
The backbone of my setup is Bell Fiber to the home, providing a symmetric 3 Gbps connection (they offer up to 8 Gbps now in Canada). Fast.com reports around 5 Gbps, which gives the house more bandwidth than most of our devices can use at once.
That bandwidth changes a few routine jobs:
- Downloading large Steam games (50GB+)
- Pulling down Ollama AI models
- Downloading ISOs for various operating systems
- Managing app and OS updates across multiple devices
- Performing media backups to my NAS
Network Backbone: 10G Switching#
My network core uses a TP-Link TL-SX3008F switch with 8 SFP+ slots. It connects the NAS, switches, and fast clients at 10G, then links back to the Bell GigaHub fiber receiver over standard Ethernet because the HomeHub lacks SFP+ ports.
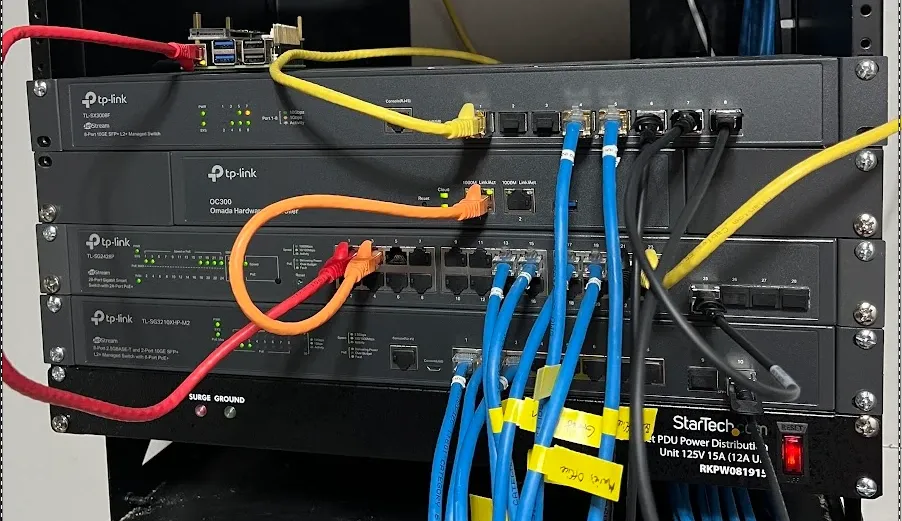
The rack photo shows a lot of cable colors. I use color as a length code. I buy cables in bulk from Infinite-Cables, assign one color to each length, and throw the spares into a single drawer.
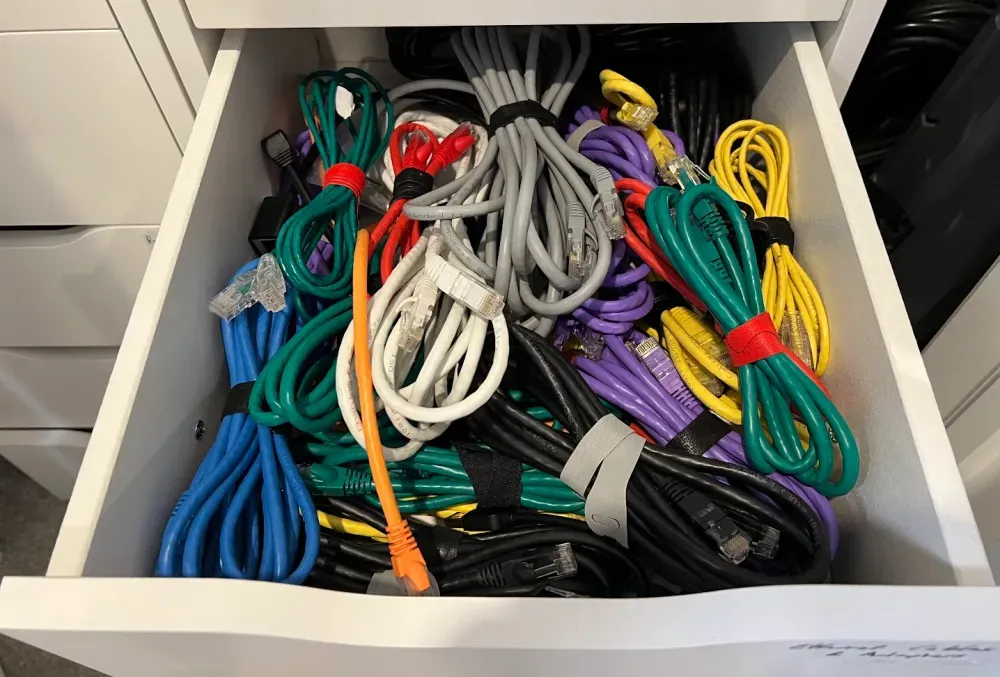
When I need a cable, the color tells me the length before I pull it out of the drawer.
Key Components:#
- Primary 10G Switch: TP-Link TL-SX3008F with 8 SFP+ slots
- PoE Switch for Critical Devices: TP-Link SG3210XHP-M2
- PoE Switch for Non-Critical Gear: TP-Link SG2428P 24-port Gigabit
- Network Management: Omada OC300 controller
Connection Tip: DAC Wherever Possible#
One important lesson: use Direct Attach Copper (DAC) cables whenever you can. They're cheaper than optical transceivers and skip the encoding/decoding work between SFP+ ports. 10Gbps Ethernet switches and SFP+ adapters also run much hotter than their 1Gbps counterparts. DAC and fiber SFP+ adapters generate less heat, which helps equipment last longer and lowers power use.
My Fiber Connection Experiment#
When I upgraded to 10Gbps networking, I bought fiber transceivers to connect my switches. Fiber transceivers cost less than 10Gbps Ethernet transceivers (~60 each) and run cooler, but I wasted money on them for short rack-to-rack connections.
I now use this connection order:
- DAC cables: Best choice for most switch-to-switch connections and nearby machines / storage (cheap, simple, cool-running)
- Fiber optics: Ideal for longer runs where DAC isn't practical
- 10G Ethernet: Use when the device requires it (hottest and often most expensive option)
For my short equipment runs, DAC wins on cost, simplicity, and reliability.
Storage Solution: NVMe-Based NAS#
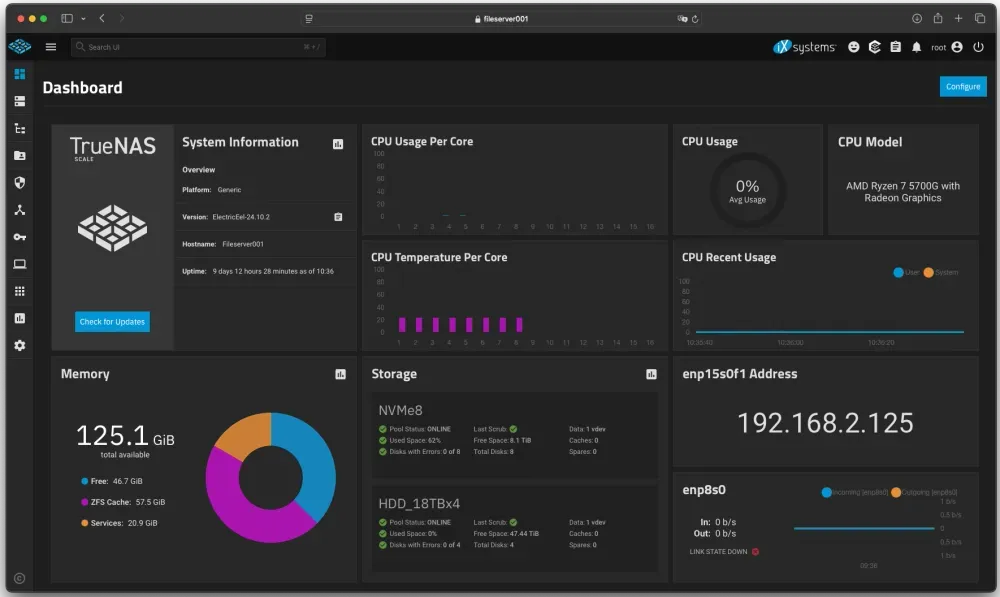
After testing a few storage configurations, I settled on a TrueNAS setup built around NVMe storage:
Current Configuration:#
- Primary Storage: 8x 4TB NVMe drives in RAIDZ1 (fast, daily-use storage)
- Archival Storage: 4x 18TB HDD drives in RAIDZ1
- Hardware: AMD Ryzen 7 5700G with 128GB RAM
- Connectivity: 10Gbps DAC connection to primary switch
Evolution of My Storage Approach#
I first tried an HDD-only NAS with 12x 8TB drives, supplemented with SSD SLOG (ZFS Intent Log) and L2ARC (Level 2 Adaptive Replacement Cache). Despite these optimizations, the performance was disappointing when browsing directories and exploring content.
I switched to an NVMe-based setup, and directory browsing became fast enough that the NAS stopped feeling like a separate class of storage. I also removed the SLOG and L2ARC tuning work, so the system got simpler and faster.
For future consideration, I've been eyeing the Asustor Flashstor 12 Pro FS6712X with its 12-bay NVMe setup and compact form factor. However, I also use my current NAS to host various services that might not perform well on the less powerful Asustor hardware.
Client Devices and Connectivity#
To use the 10G network:
- My daughter's gaming PC has a dedicated 10Gbps SFP+ card
- Media center connected to TV uses a USB 3.2 5Gbps Ethernet adapter
- My primary machine (MacBook Air M3 with 24GB RAM) connects through an OWL Thunderbolt Pro Dock with 10Gbps Ethernet
- The gaming PC doubles as an Ollama server and Windows testing machine, accessible via Windows Remote Desktop
Keeping these devices on the same fast network as the NAS makes large file transfers, media playback, and remote desktop sessions feel local.
Security: The Decision to Stay Internal#
I used to expose services from my home network to the internet because I wanted remote access to my data and applications. Over time, almost every exposed service generated serious security vulnerability alerts.
After the same pattern repeated a few times, I stopped exposing services to the internet. The patching and monitoring work outweighed the convenience.
I already use cloud services for data storage and sharing, like Google Drive and GitHub, and I don't self-host public-facing services. Cloud tools and occasional VPN access cover the cases where I need remote access.
My home network no longer accepts direct inbound traffic from the internet. That removes a whole category of chores from my week.
Home Infrastructure: What I Would Have Done Differently#
Our house is new (built 4 years ago) and is wired with Cat 6e Ethernet, which has handled 10Gbps connections without issues. I would still change several infrastructure decisions:
Ethernet and Networking#
- More basement Ethernet ports: I installed only one, but as we added a gaming station and relocated the TV, four would have been ideal
- Garage Ethernet: Should have installed at least one port for an access point
- More access points: I overestimated coverage from ceiling APs and ended up hiding additional units under furniture to ensure complete coverage
Wireless Coverage: Access Point Strategy#
My wireless network uses a mix of primary and secondary access points placed throughout the property:
Primary Access Points#
I have three Omada WiFi 6 AX3600 Wireless 2.5G Access Points (EAP660 HD), which were top-of-the-line when I purchased them:
- Two are installed in the ceilings as intended
- One had to be placed under a dresser to fix a coverage problem I hadn't anticipated
Secondary Access Points#
To complement the primary APs and eliminate dead spots, I added three EAP225-Outdoor Omada AC1200 Wireless Gigabit Outdoor Access Points:
- One in the garage (where I wish I had installed an Ethernet port during construction)
- One hidden in the storage area of the basement to fix a dead spot
- One in the backyard, operating in a mesh setup with the primary APs
My 2.5Gbps PoE switch powers all six access points, so I do not need separate power supplies. Wireless speeds exceed 500 Mbps on mobile devices across the property (e.g. iPhone 13, MacBook Pro, etc.).
More access points in the right places beat fewer high-powered units. Building materials, furniture, and interference create coverage gaps that are hard to predict from a floor plan.
Key Takeaways#
If I were wiring a house again, I would install more Ethernet drops and power outlets than the floor plan suggests, including in the basement and garage, and run PoE anywhere I might ever want an access point.
For 10G gear, I would think about heat before buying adapters: DAC for short runs, fiber for longer ones, and 10G Ethernet only when a device requires it.
On storage and security, I would move to NVMe sooner and keep public internet access out of the home network unless there is a specific reason to expose a service.
The current setup feels boring in the best way: downloads finish fast, the NAS responds with no waiting, remote desktop works without fuss, and WiFi reaches the corners of the house we use.